Arduino Learning
Summary
What is Arduino®?
Arduino® is an open source hardware and software prototyping environment, but what does this mean? Open source means that the boards and programs have been developed by a community of people who are passionate about building their own ideas into projects, but also are willing to share their knowledge, designs, code and skills with other like-minded people. You not only have access to what's in this kit, but a wealth of shared resources, examples and project ideas to help you develop and learn. You can find out more at the Arduino® website: www.arduino.cc.
Arduino® Hardware:
The Arduino® boards are designed with education in mind- in fact they were developed at a University to make electronics easy for artists and other people unfamiliar with programming electronics. It's possible to build complex circuits without soldering, but simply by plugging jumper leads, modules and breadboard together with the main Uno board.
Arduino® Software:
The Arduino® IDE (integrated Developed Environment) is available as a free open-source download that works on Windows, Mac and Linux, and provides beginners with a simple intuitive programing language. It also allows advanced users to develop powerful programs using the vast range of downloadable libraries that the Arduino® community has created.
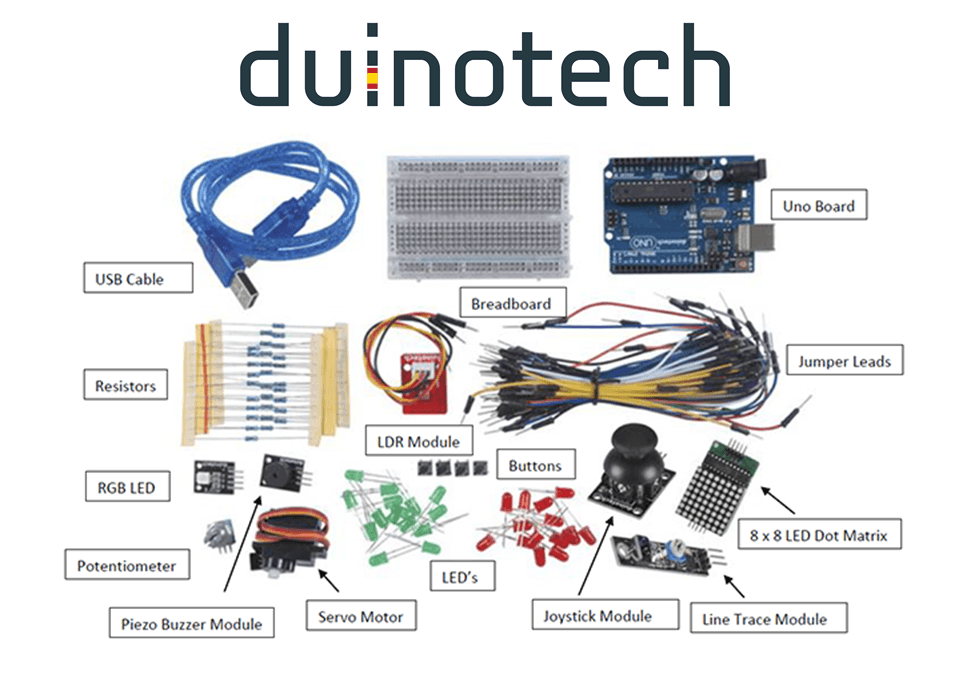
This Kit:
We have specially selected the components in this kit to allow an easy entry into the world of Arduino®, so that you can work with the examples included with the Arduino® IDE, and obtain a broad understanding of how the Arduino® software and hardware interact. This kit is also compatible with the full range of Duinotech shields and modules, which can be used to extend your Arduino® experience.
Getting Started
Before using your Duinotech Beginner's Kit, you'll need to download and install the Arduino® IDE from www.arduino.cc/en/Main/Software. Open the Arduino® IDE, and plug USB cable into the Uno board and a USB port on the computer. Let your computer install the drivers for the Uno board.]
Similar projects you may be interested in
.jpg%3Fbranch%3Dprod&w=1080&q=75)
.png%3Fbranch%3Dprod&w=1080&q=75)
.jpg%3Fbranch%3Dprod&w=1080&q=75)