Progress Bar

Skip to main content

Jaycar
...

Game Of Life

Game Of Life

Difficulty
Festive

Summary

Looking for a new conversation starter in your home? Build our Game of Life wall thermostat using new XC4390 addressable RGB light strip. The display uses the nice bright colors from the strip to show off the temperature and the interesting patterns of Conway's Game of Life.


Materials Required

1Duinotech Arduino Compatible W2812B RGB LED Strip 2mXC4390
1Arduino Compatible Temperature and Humidity Sensor ModuleXC4520
1Leonardo Tiny Atmega32U4 Main BoardXC4431
1Economy Breadboard Jumper Kit - 5 coloursWH3032

Library

Author

Version

Adafruit NeoPixel

Adafruit

1.6.0

Adafruit NeoMatrix

Adafruit

1.1.5

SDHT

Helder Rodrigues

2.0.0

This repository contains the code for the 32u4 mini. It uses both the Adafruit NeoPixel and NeoMatrix libraries, ironically enough using the matrix to display the temperature and the neopixel strip to manage the game of life; It also then uses a small timer check in the main loop to switch between displaying the game and displaying the temperature.

Game of life is just implemented with a 100 element 8bit array that is bitshifted between each state. A neat idea could be to use some of the bits to

The matrix is probably the biggest part of the build and so we'll cover it first. You'll need:

a Knife

Side cutters or scissors. (or can use knife again).

a 170mm x 170mm square backing cardboard or acrylic to mount the LED lights onto.

a bit of patience.

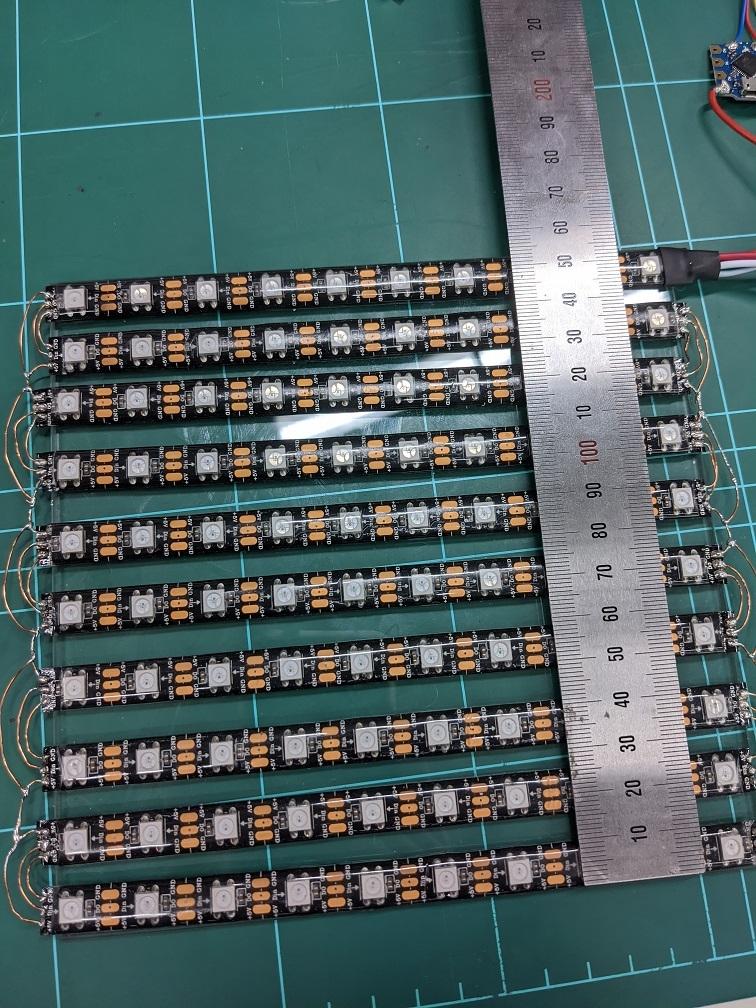
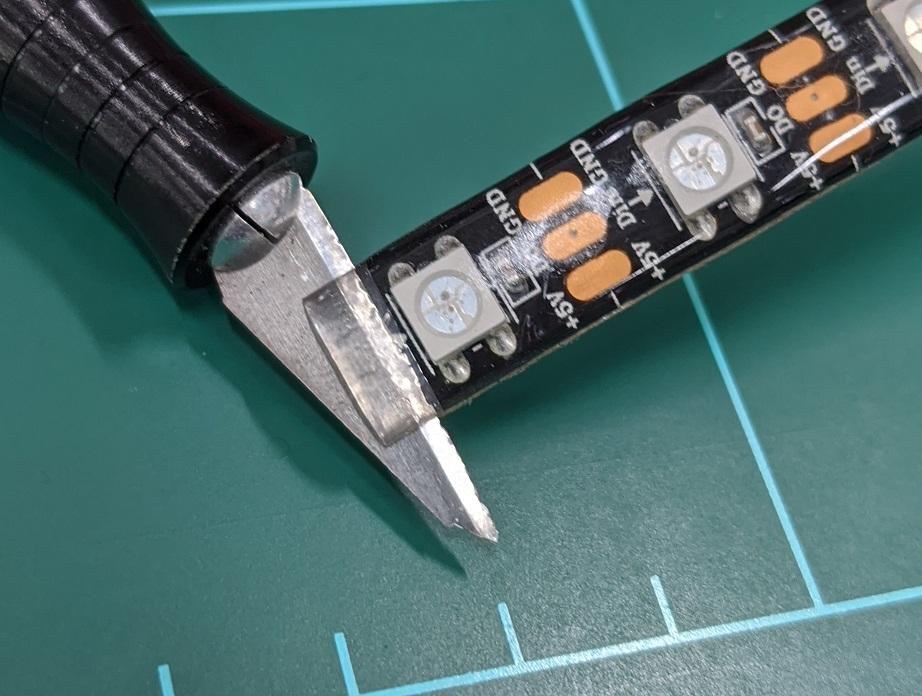
The strip is made up of 120 RGB LEDs which can be individially cut across the terminals as shown below

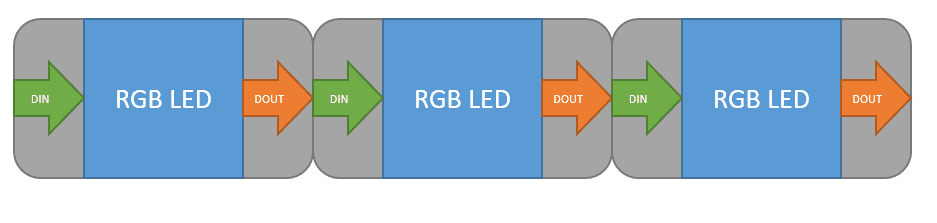
The connection protocol is simple for this, as they are just "neopixel" like devices, each LED has a DATA IN and DATA OUT which chain together to form the length of striplighting.

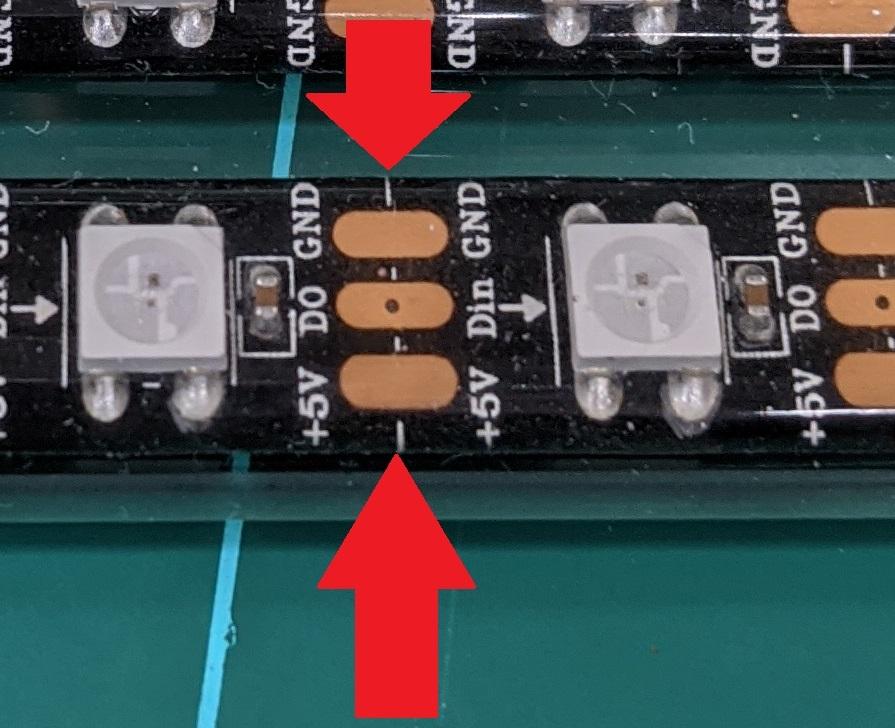
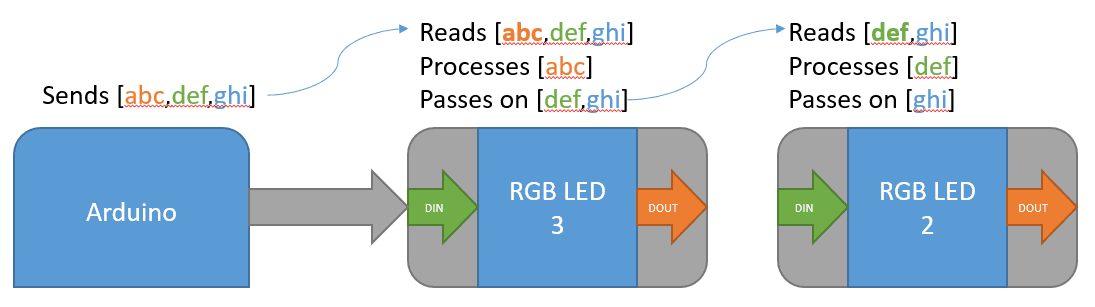
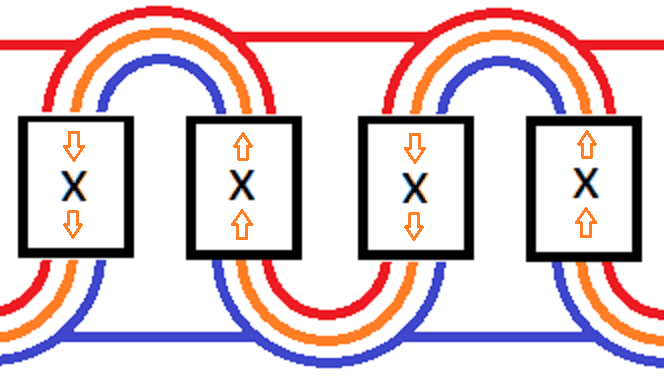
The data flows from the arduino through the LED lights like such: ( this will be helpful if you find that only some of your matrix is lighting up; you'll know exactly where the solder connection is.) The arduino will send all of the data to the first LED, which will interpret what you want in the lighting patterns before passing on the rest of the data to the remaining LEDs in series.

For our purposes, we will zig-zag the strips so that they make a square shape.

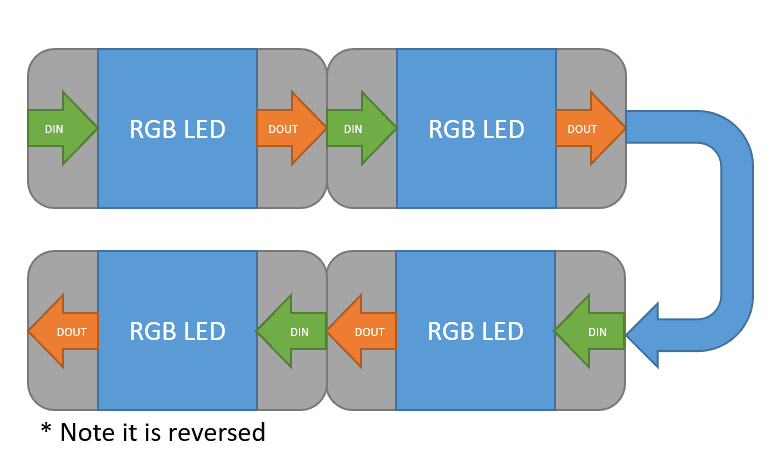
As we have 120 of them, the largest square we can acheive is 10x10, so we will cut them into strips of 10 LEDs that can then be connected together in a zig-zag pattern; 10 rows big.

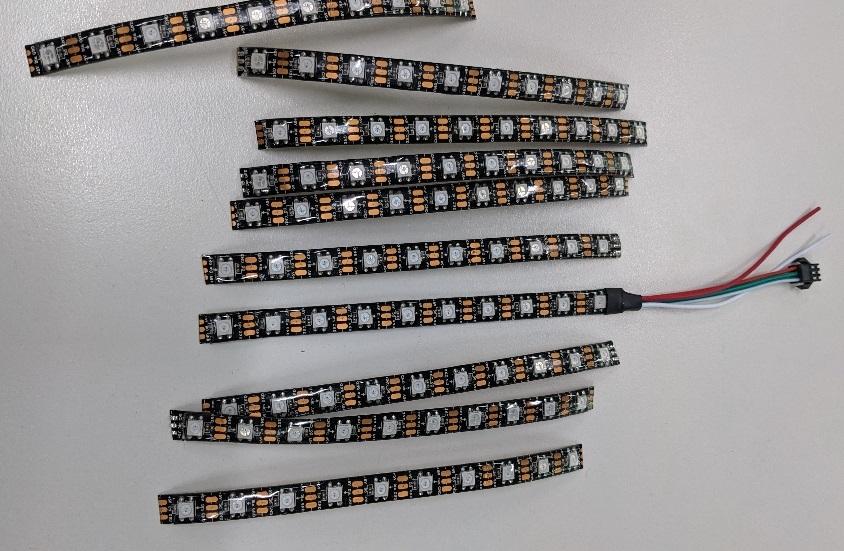
It might be easier to solder the connections while you have the strips out like this, which you can do by first sliding a knife under the waterproofing rubber and then snipping it with a pair of sidecutters or scissors. you can also try and cut more with a knife if you're careful.

Then solder as per the diagram above, matching VCC to VCC and GND to GND, with DOUT going to DIN of the next strip. It also helps to first put a big blob of solder on each of the pads.

After you have done a few of the zig-zag chain, it's important to connect up all of the links together, which not only makes it stronger but it also helps the power get to the places where it needs to go throughout each strip.

After doing a few, it can look a bit rough if you rush it, but most of this will be contained behind the photo frame anyway.

As we want them to look even, we'll try and space them out when placing them down on the backing. Each strip is about 6.5mm away from each other edge-to-edge, to the total of 17mm from one LED light to the next.

Connection

Module

D9

DHT sensor wire (yellow)

D11

first LED Data In, Green lead

+ (vcc)

VCC on DHT, RED lead on LEDs

- [] (gnd)

GND on DHT, White lead on LEDs

Install the libraries that were specified above in the 

 section and use the micro USB to connect your 

 Leonardo tiny to the computer. you should be able to select "Arduino Leonardo" as the board to program and choose the port to program. If everything is wired up correctly and the code is uploaded correctly, it should start working immediately.

There's a few changes that could be done to this project. One we were thinking of was doing 3 seperate game of life's, for the Red, Green and Blue. This could produce some trippy effects and would invole minimal changes to the gameoflife.h file.

To make improvements:

Star this respository at the top of the github repository page.

'Fork' this repository into your own account.

Make changes to your local github copy by 

Cloning

 your version, 

commit

-ing changes, and 

pushing

 to your github account

open a pull request to merge your changed version of the project with our master version

We'll review the changes and merge them in if they help make the project great! plus your name will be included into a contributors list.

Similar projects you may be interested in

Microbit Christmas
Festive
Microbit Christmas
Difficulty

Jaycar DIY Christmas Star
Festive
Jaycar DIY Christmas Star
Difficulty

Festive
LED Basic Christmas Tree
Difficulty

Strobing Christmas Star
Festive
Christmas Star
Difficulty