Pin Drops
Learn the best way to remove soldered header pins that are messing with your game plan.
Especially if you're just starting out with Arduino, you'll notice that a few projects - such as the GPS Speedometer and Music Beat Bar - need you to reconfigure the header pins. In some cases, the factory default is to have the pins on the 'wrong' side of the board for the project, or sometimes pins you don’t need are obstructing components you do.
Instead of reinventing the wheel, check out this best-practice overview. We also have a detailed step-by-step guide with photographs if you need a little extra help.
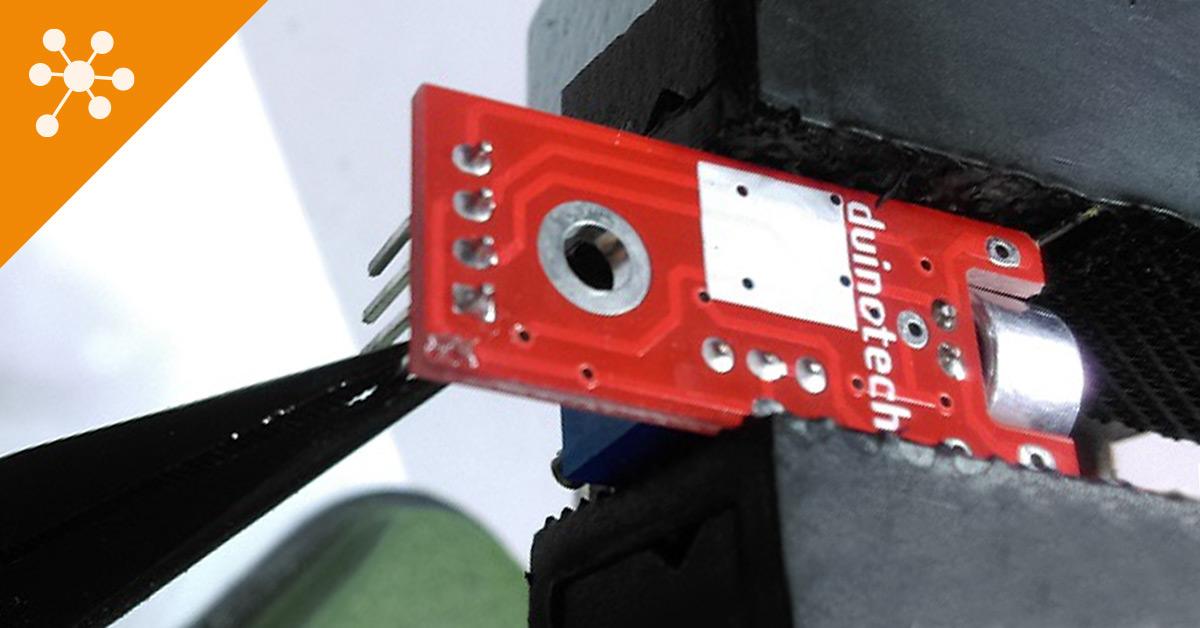
1. Clamp the module in a hobby vice with the pins facing downward. Using an illuminated magnifier will make it easier to work with smaller boards such as a Nano.
2. Warm up your soldering iron and grab the first pin with a pair of precision long-nose pliers. Apply gentle downward force as you heat the solder until the pin slips out of the solder pad and plastic grommet.
3. Clean the pad by applying fresh solder to collect any residue and manufacturing chemicals.
4. Mop up the solder using desoldering braid, and finish by cleaning the board with an old toothbrush dipped in isopropyl alcohol.