Progress Bar

Skip to main content

Jaycar
...

Microbit Christmas

Microbit Christmas

Difficulty
Festive

Summary

Combine a micro:bit XC4320 and breakout board XC4330 to create an electronic christmas tree using up to 12 LEDs and your own imagination. Decorate the tree any way you like and make the LEDs dance around on your creation. Battery operated and no soldering required.

Requires 2xAA batteries (not included)

Materials Required

1Micro:Bit Go Development Board BundleXC4320
1Duinotech BBC micro:bit Breakout Board with 2 x AA Battery HolderXC4330
3Blue 5mm LED 350mcd Round DiffusedZD0185
2Green 5mm LED 80mcd Round DiffusedZD0170
3Yellow 5mm LED 70mcd Round DiffusedZD0160
1150mm Socket to Socket Jumper Leads - 40 PieceWC6026
1Eclipse AA Alkaline Batteries - Pack of 2SB2424

Some scissors

A small knife

Glue stick

Firm thick cardboard

Sticky tape

First step is to put the micro:bit into the breakout board as shown.

You must make sure the batteries are facing the same direction as the picture under the battery holder. Connect the power lead from the board up to the power connector on the micro:bit and turn the breakout board on. You should see the micro:bit come to life.

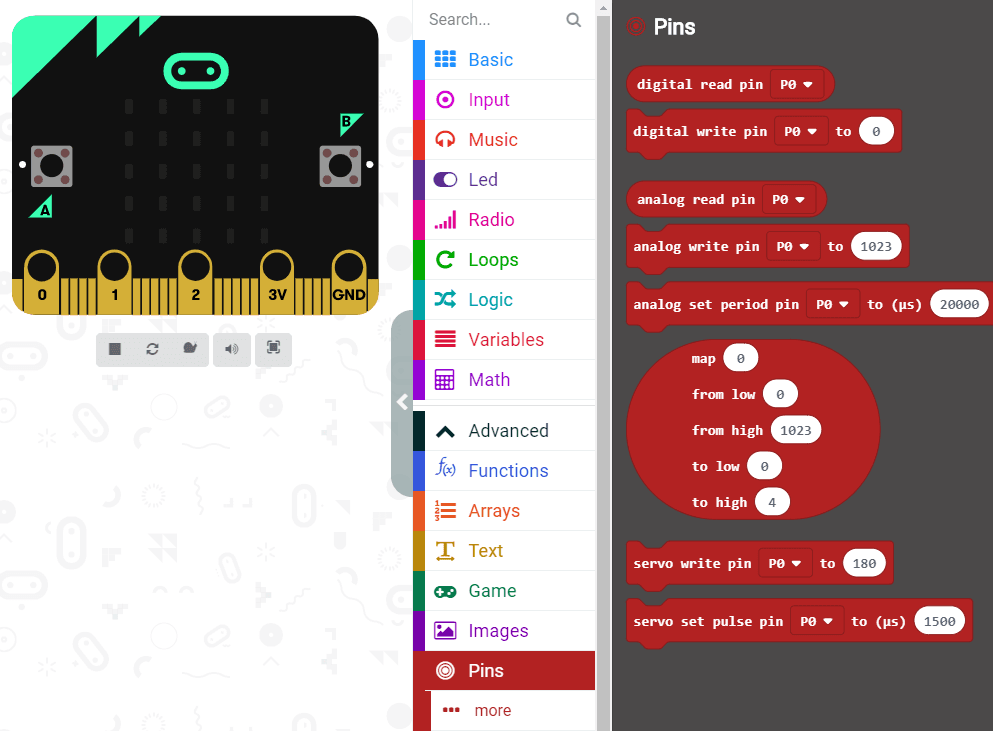
If you look closely at the breakout board, you will see each of the pins are labelled as shown:

The pins are labelled from 0 -> 16, which is what we will connect one lead of the LED to, then we will plug the other lead to one of either 0v or 3v

Find a nice picture online that you want to light up with LED lights. Here we used a picture of a tree from google images, but you can use anything. You will also need a small piece of firm cardboard, from a small box or similar, to poke the LEDs into.

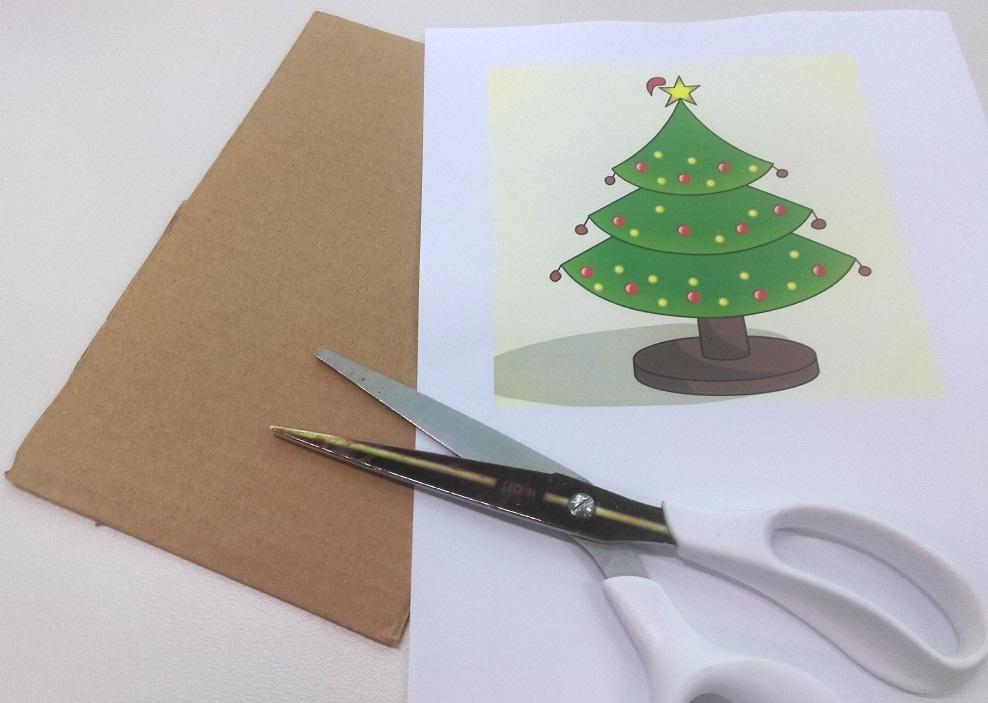
cut out this image and stick it to the cardboard so that the surface and well glued to the cardboard.

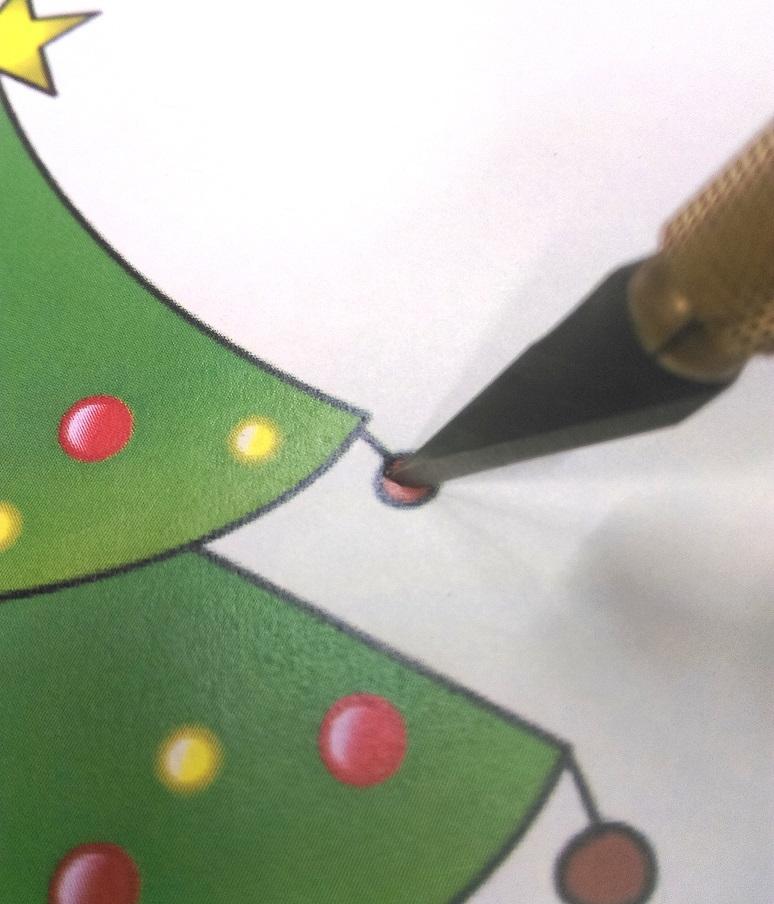
Now is where we will use the knife to cut a small hole to push the LEDs through. 

Get an adult to help you.

Start by making a small x shape where you want the LED to go. being gentle and slow is key here so that you do not make the hole too big, about the size of the LED is the correct size.

Once the x marks the spot, it is generally better to first push the LED in through the front of the face, so that the cardboard curls towards the back of the card, such as shown:

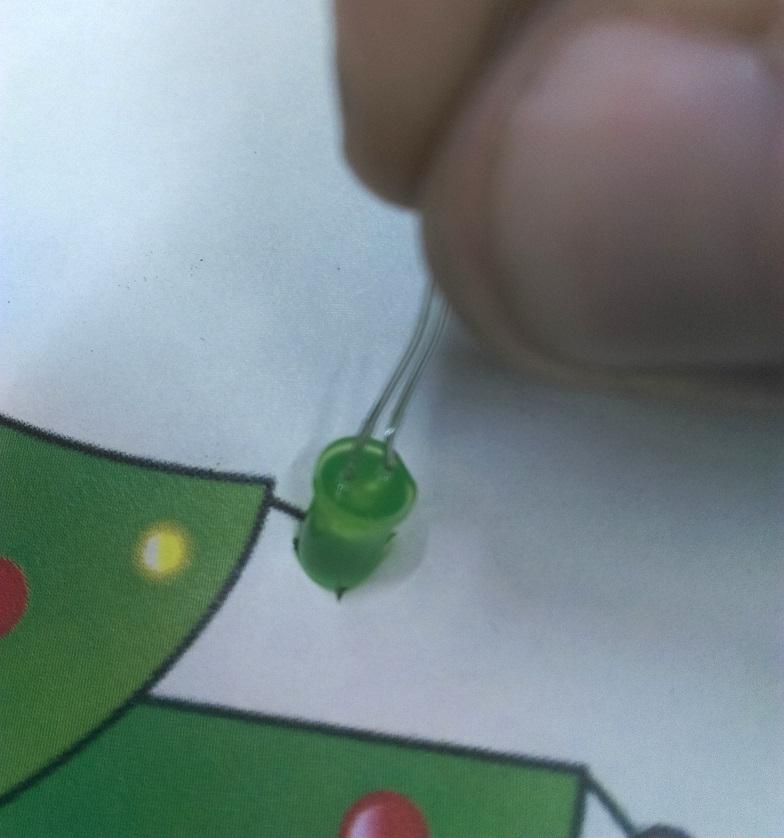
When viewed from the back, we can see the cardboard has bent through, which shows on the back of the board, rather than the front.

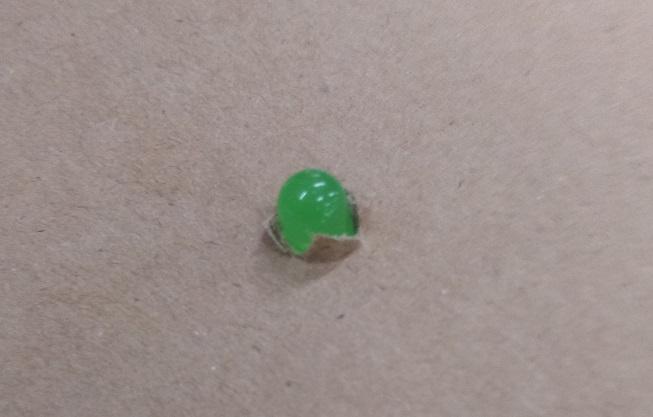
Once the LED is in this way, twist and slide it out, and you should find that the cardboard will retain it's shape and maintain a nice clean hole for you to slide the LED in through the proper way.

Likewise, the cardboard cut-outs are now behind the face, not getting in the way of the picture.

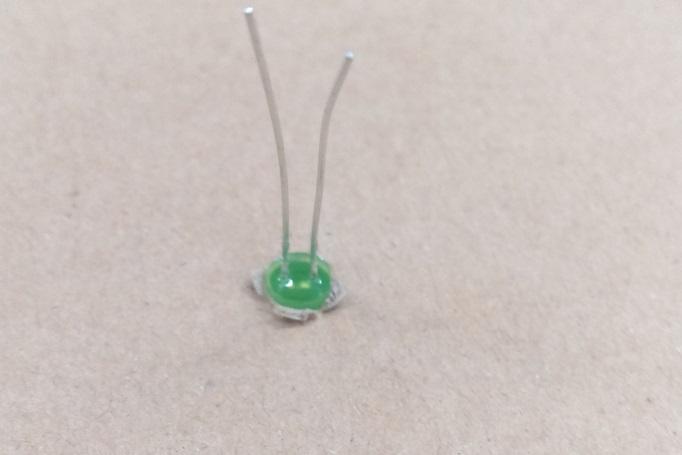
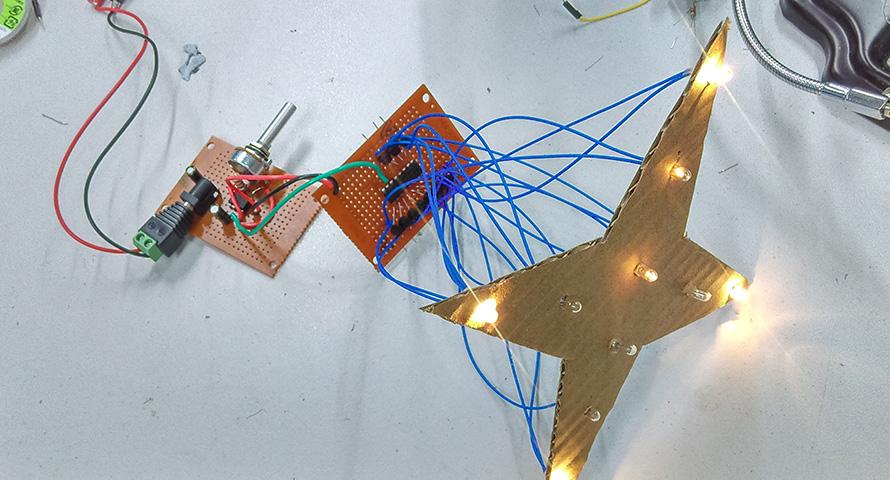
From here, you can simply bend the LED leads down to lay flat on the board. Pull off 2 wires from your jumper leads (

) to slide onto the legs of the LED, remembering which leg is longer than the other.

LEDs need to be connected in the right way; The longer leg is the positive connection for the LED, which will turn on when there is voltage.

Below, we have connected the positive to Pin0 and the negative to 0v.

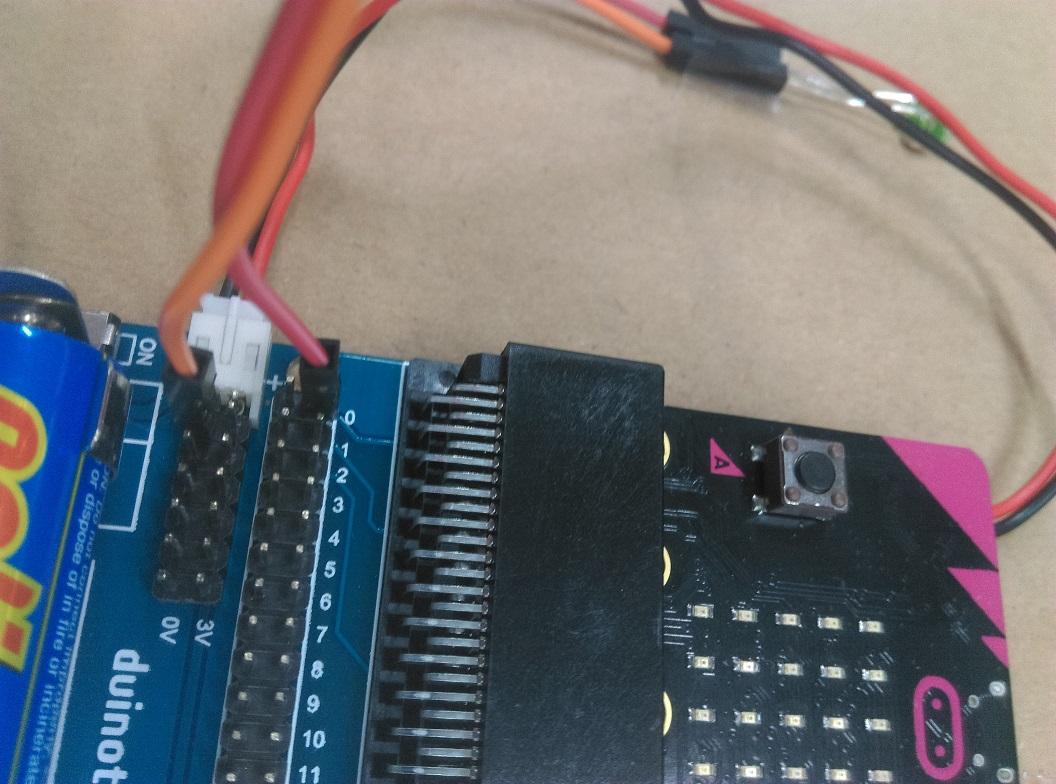
You can do this for the first 6 LEDs. When you want to connect more LEDs but do not have any 0v connections available, you will be able to connect the 

positive

 to the 3v connection and the negative to any of the pins.

(We will explain how to turn these on in the programming section below.)

Head on over to 

 to start writing code.

When you start up the editor you should be taken to a blank project page where you are able to put command blocks. This is what the editor should look like:

The command block that we want is under Advanced > Pins - you can use this to turn the individual pins on and off. Drag the block digital write pin P0 to 0 onto the editing panel.

Also drag a Basic > pause block onto the panel, and change it to 500 (ms)

Click to highlight a block with a yellow boarder, then press Control+c to copy and Control+v to paste the block, you should now have two blocks that seem identical, do this for both the digital write and the pause blocks so you have 4 blocks in total, and arrange them as such:

Copy and paste the blocks to set each pin high and low in whatever pattern you like, making sure to change the pin number according to which LED you have connected to that number on the breakout board.

With LEDS that are connected between the Pin (+) and 0v (-) connections, setting a digital write of 

1

 will turn the LED ON.

Likewise, if you have an LED connected between 3v (+) and Pin (-) connection, setting a digital write of 

0

 will turn the LED ON. We will let you play around with it and find out why.

Once you have finished your code and want to see it in action, connect the micro:bit to the computer using a micro-usb cable.

Press download on the micro:bit online editor and it will download a new file for you with a .hex extension. This should be in your downloads folder and could be called something such as microbit-Untitled.hex

You should see the micro:bit show up on your computer as if it was a thumb-drive. It won't have much information in it at the moment

drag the file from your downloads folder into the micro:bit drive. the window should close and re-open, meaning that your micro:bit has been reset and is now using your code.

If you have done everything correctly, your LED lights should be flashing merrily as you programmed them to.

If the LEDs are not lighting up, make sure the breakout board is turned on and that all of the connections are secure.

If the Lights are on without flashing, make sure you have 2 delays set to about the same value so that there is equal amount of "turn off" time as there is "turn on" time. If it turns off for 1ms, you will not be able to tell that it turned off at all. Make sure the animation on the make-code editor looks right to you.

Congratulations, you have created your own micro:bit christmas card. Try to add the buttons so that the buttons can change the pattern of the LEDs.

Some scissors

A small knife

Glue stick

Firm thick cardboard

Sticky tape

Future Improvements

Similar projects you may be interested in

Jaycar DIY Christmas Star
Festive
Jaycar DIY Christmas Star
Difficulty

Festive
LED Basic Christmas Tree
Difficulty

Festive
Game Of Life
Difficulty

Strobing Christmas Star
Festive
Christmas Star
Difficulty