Make an alarm for your cubby house
Making a burglar alarm for a cubby house is a great way for your kids to learn about electric circuits and switches.
The circuit we're going to make uses the door of your cubby house as a switch that activates a buzzer, letting you know when the door has been opened. But you can easily adapt this to protect a window – or even integrate a light to provide you with an extra alert.
What you need
‣ PC mount 9V battery clip
‣ 9V battery
‣ 2 40cm-long thin pieces of electrical wire (A pack of different wires is useful as you can use it for different projects. For this project, use 2 red wires so they match with the wires coming from the battery clip and buzzer)
‣ Soldering iron and solder
‣ Weatherproof buzzer
‣ Liquid electrical tape
‣ 3 metal flat top thumbtacks
‣ 1 wooden clothes peg
‣ 5cm x 1cm piece of cardboard
‣ 10cm-long piece of string
‣ Side cutters
‣ Hole punch
‣ 2 small screws for attaching the buzzer to your cubby
‣ Screwdriver
‣ Drill
‣ Wood glue or contact cement that works with wood
Making your cubby house alarm
Step 1
Strip 1cm of insulation from both ends of the 2 red wires. Strip 1cm of insulation from the ends of all the wires coming from both the battery clip and the buzzer.
Step 2
Solder the end of the first red wire to the red wire coming from the battery clip. Let that cool thoroughly before proceeding. Once cool, apply liquid electrical tape to the soldered area to ensure the exposed wires are covered.
Step 3
Take the second red wire and solder the end to the red wire coming from the buzzer. Let it cool thoroughly before proceeding. Once cool, apply liquid electrical tape to ensure the exposed wires are covered. At this point you should have the end of one red wire from the battery clip and one red wire from the buzzer not connected to anything.
Step 4
Solder the black wire from the battery clip to the black wire coming from the buzzer. Allow the solder to cool thoroughly and apply liquid electrical tape to the soldered areas to ensure the exposed wires are covered.
Step 5
Use the hole punch to make a hole at one end of the strip of cardboard. Thread the string through and knot it so it doesn't get pulled through the hole.
Step 6
The clothes peg and two of the thumbtacks are going to be the switch that activates the buzzer when the door is opened. Wrap the exposed end of the red wire from the battery clip around one thumbtack and press it into the inside leg of the clothes peg. Repeat this with the red wire from the buzzer and the other thumbtack, pressing it into the inside leg of the other side of the peg, so the tops of the two thumbtacks touch when the peg is closed.
Step 7
Now it's time for a test. Put the 9V battery into your battery clip. The buzzer should buzz. If you open the peg, the sound should stop. If it doesn't work, check that all your connections are correct and that the thumbtacks make contact when the peg is closed.
Step 8
Open the clothes peg. Slip the piece of cardboard inside so that it separates the tops of the thumbtacks and close the peg around it. This will stop the buzzing.

Step 9
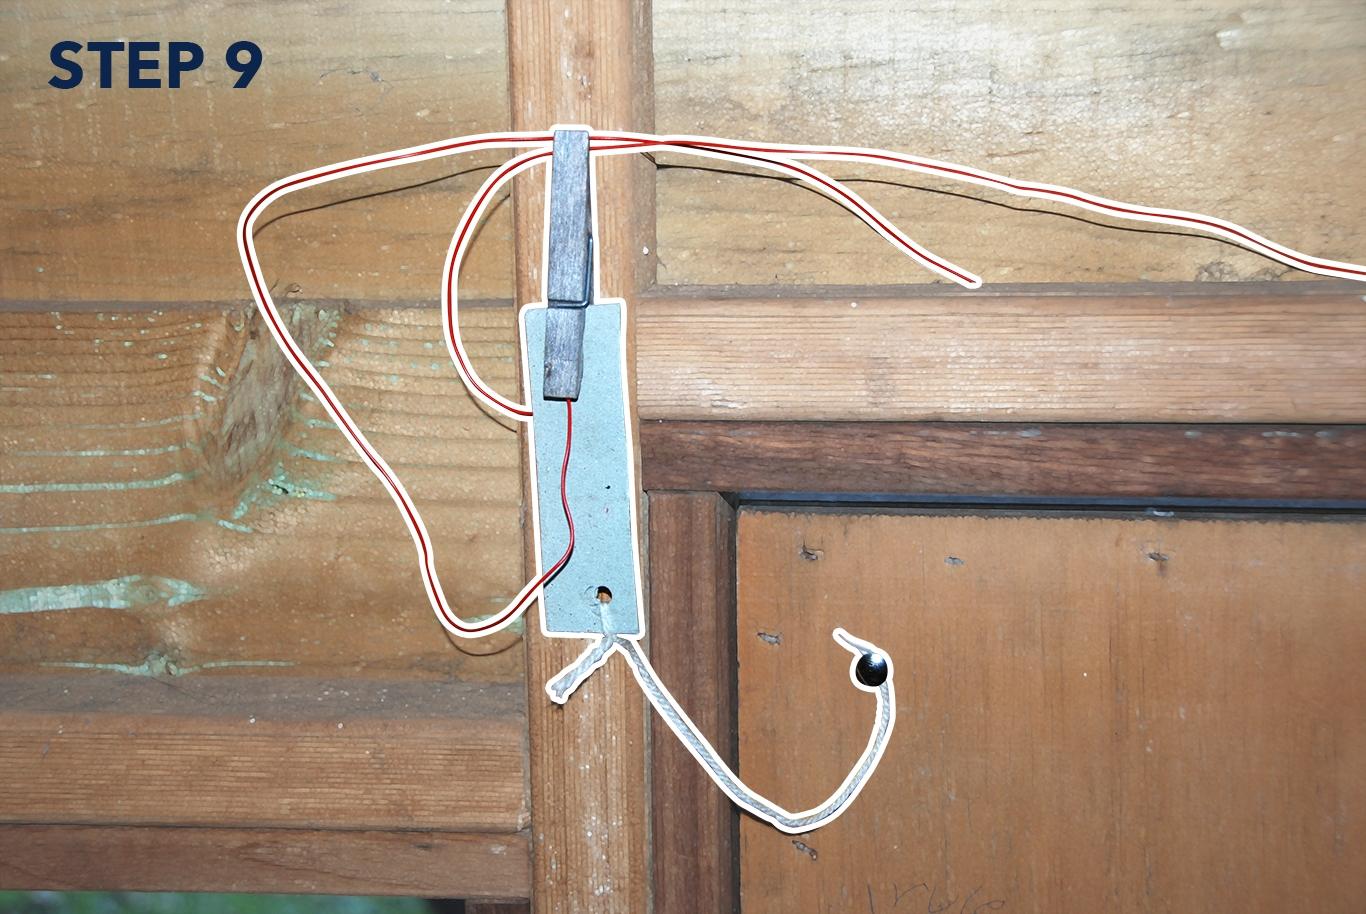
With everything working, it's time to mount the alarm to the inside of your cubby house. Make sure the battery is removed from the clip. The exact positioning will depend on the lengths of your wires and the piece of string. To start, wrap the other end of the piece of string around the remaining thumbtack and press it into the door on the side opposite the hinges.
Step 10
Hold the piece of cardboard at the other end of the string so the string is taut to give you a guide as to where you'll need to mount the peg on the door frame. Stick the peg to the wall using the wood glue so that the cardboard strip can reach it while keeping the string taut. You'll need to wait for the glue to dry before proceeding.

Step 11
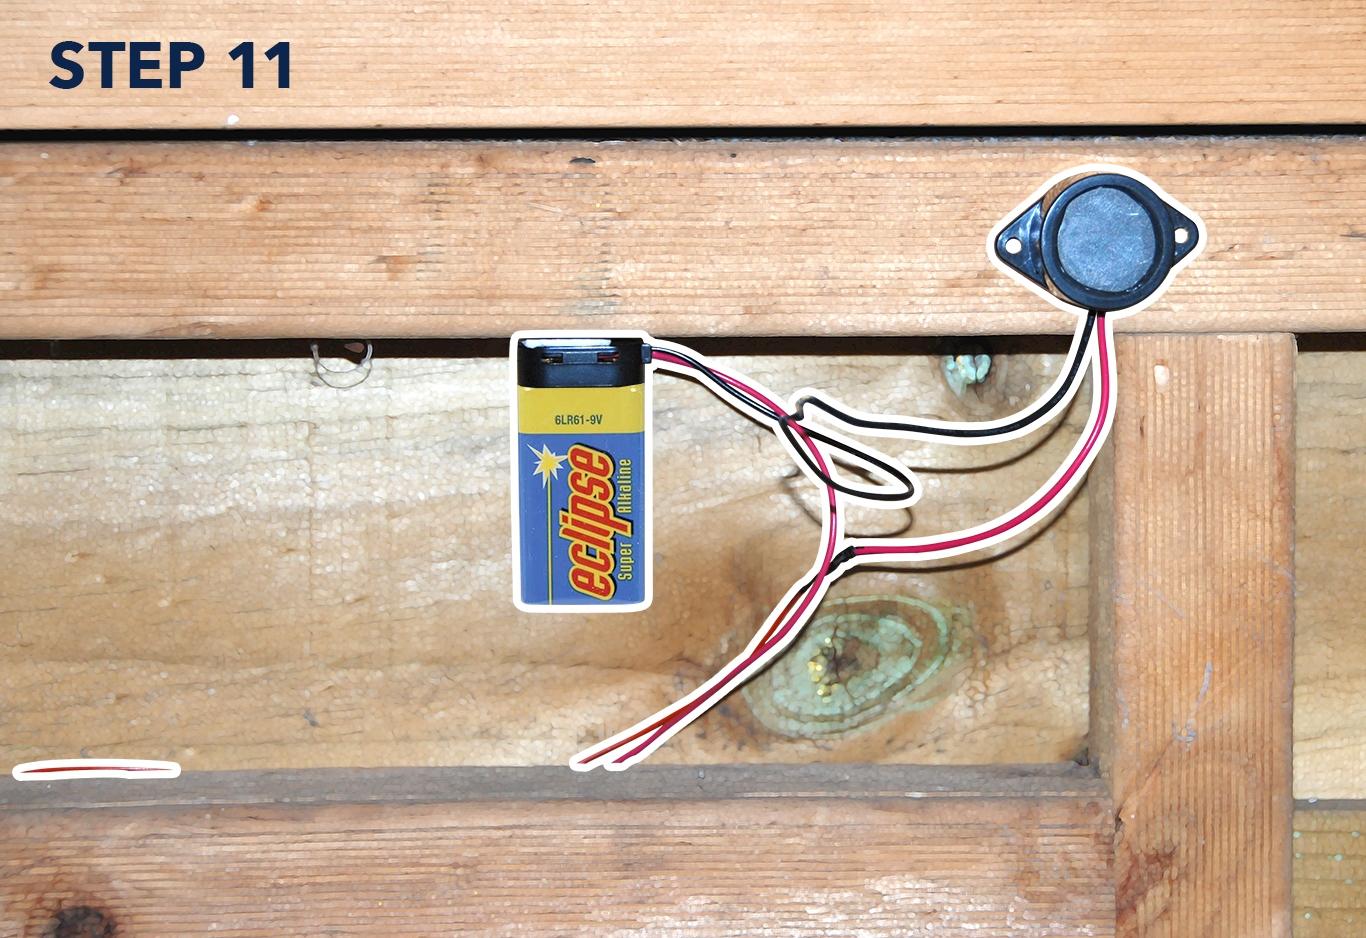
Once dry, use glue or double-sided tape to attach the battery clip, without the battery in it, to the wall. If using glue, you'll need to wait for the glue to dry before proceeding.

Step 12
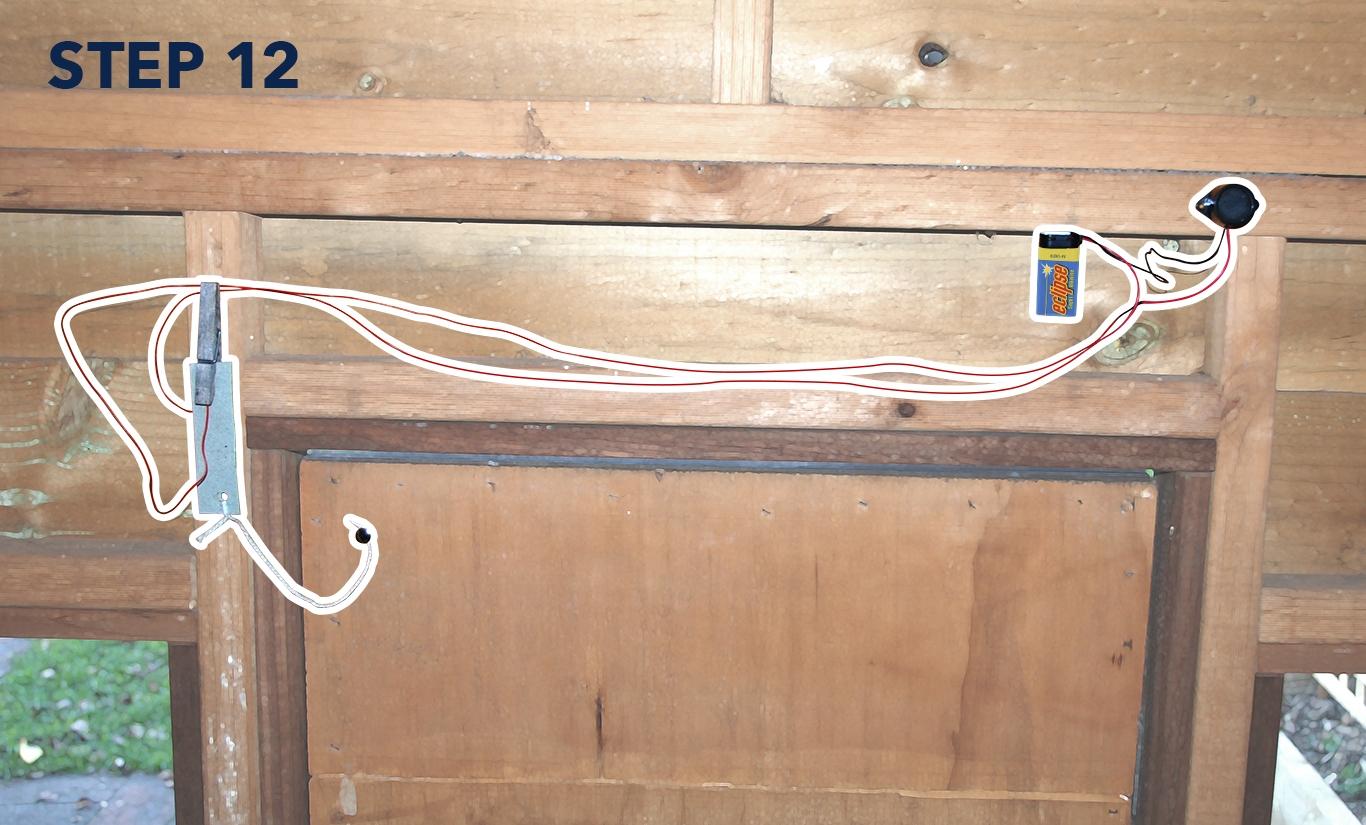
Finally, attach the buzzer to the wall using screws or glue. Once complete, place the 9V battery into the battery clip. Your alarm is now ready to use!
Testing your alarm
The alarm will sound when the door is opened. When the door opens, the cardboard strip will be pulled from between the thumbtacks in the clothes peg. This will complete the circuit between the battery and the buzzer and will sound the alarm.