Firstly download and run GIMP.
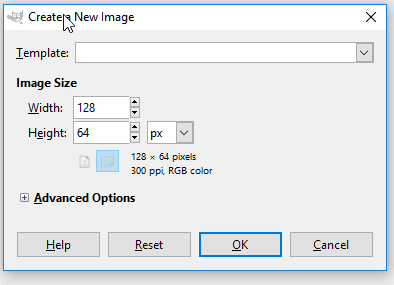
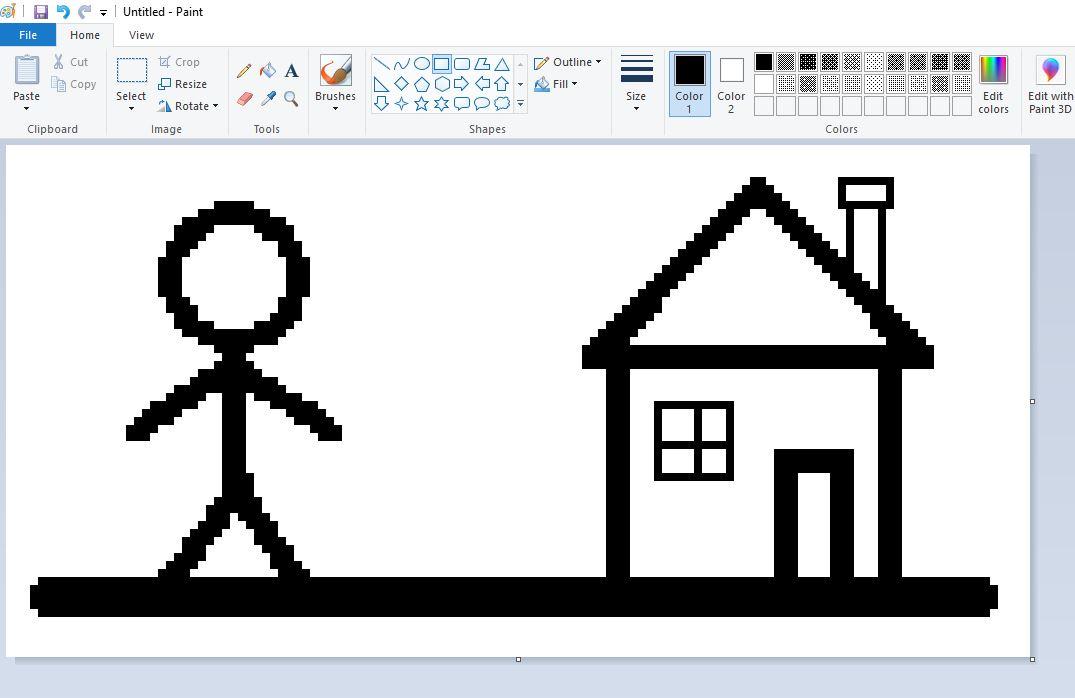
If you did not create an image with MS paint, you can create a new image of size 128x64 pixels as shown in the picture below:
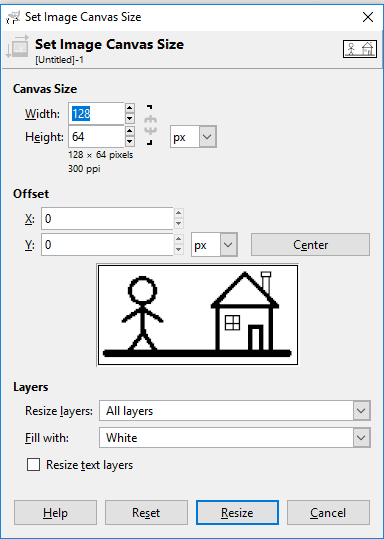
or otherwise get your image and reduce it in size to 128 x 64 via Image -> Canvas Size.
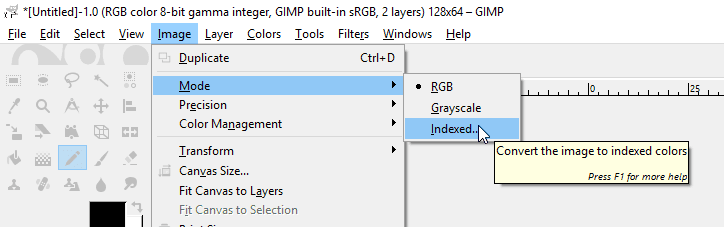
As the OLED screen we are using only has 1 bit data (ie: on or off) we must change the image mode to be similar 1-bit sized.
Firstly go to Image -> Mode -> Indexed.. And set the colormap to the 1-bit pallet

The filetype we want for the OLED is actually an XBM filetype; Go to File -> Export As and choose XBM with the
"Select File Type (By Extension)"
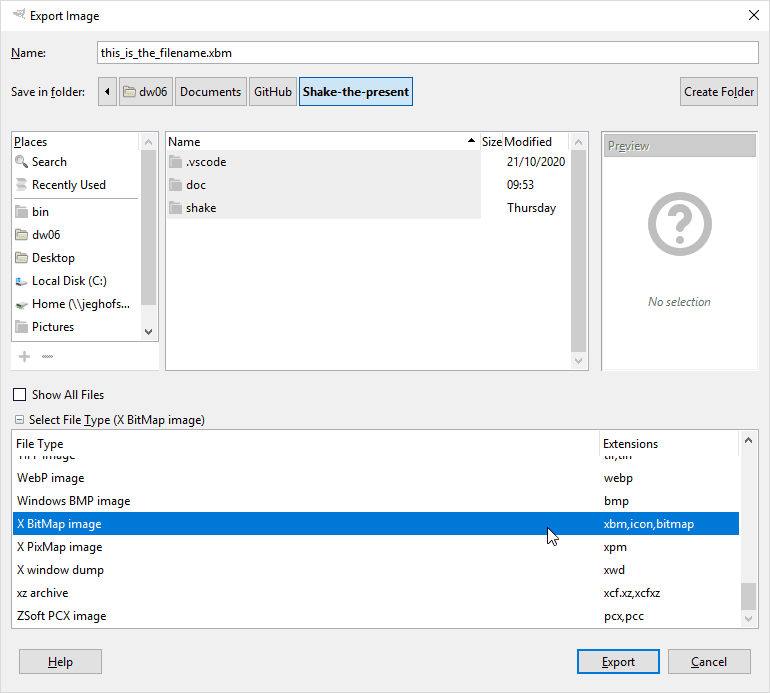
you can name the file something easy to remember, such as santa.xbm
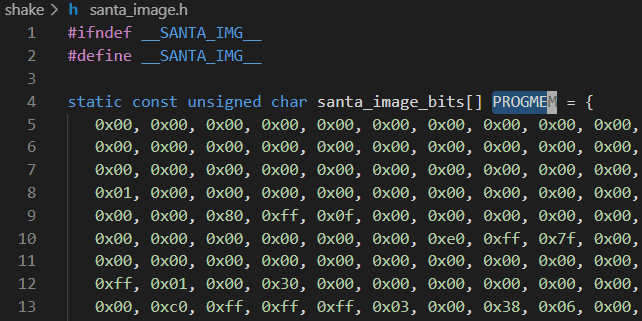
Once you have exported the file as XBM, you can then rename it to santa.h file. This is so the arduino IDE can pick it up and include it normally. XBM is an old file format used in the early days of computers which were just straight C code, such as what's seen below:
We've managed to fit 2 images into the program this way, but space is limited so it might not be a good idea to fit a 3rd image unless you get something big and chunky like the
SAMD12 board.
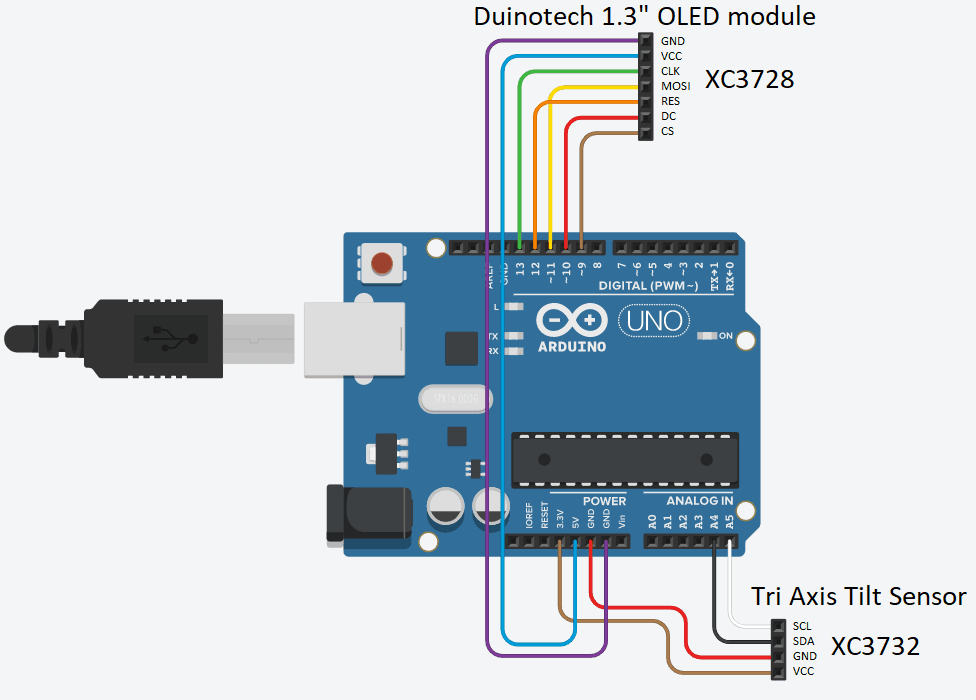
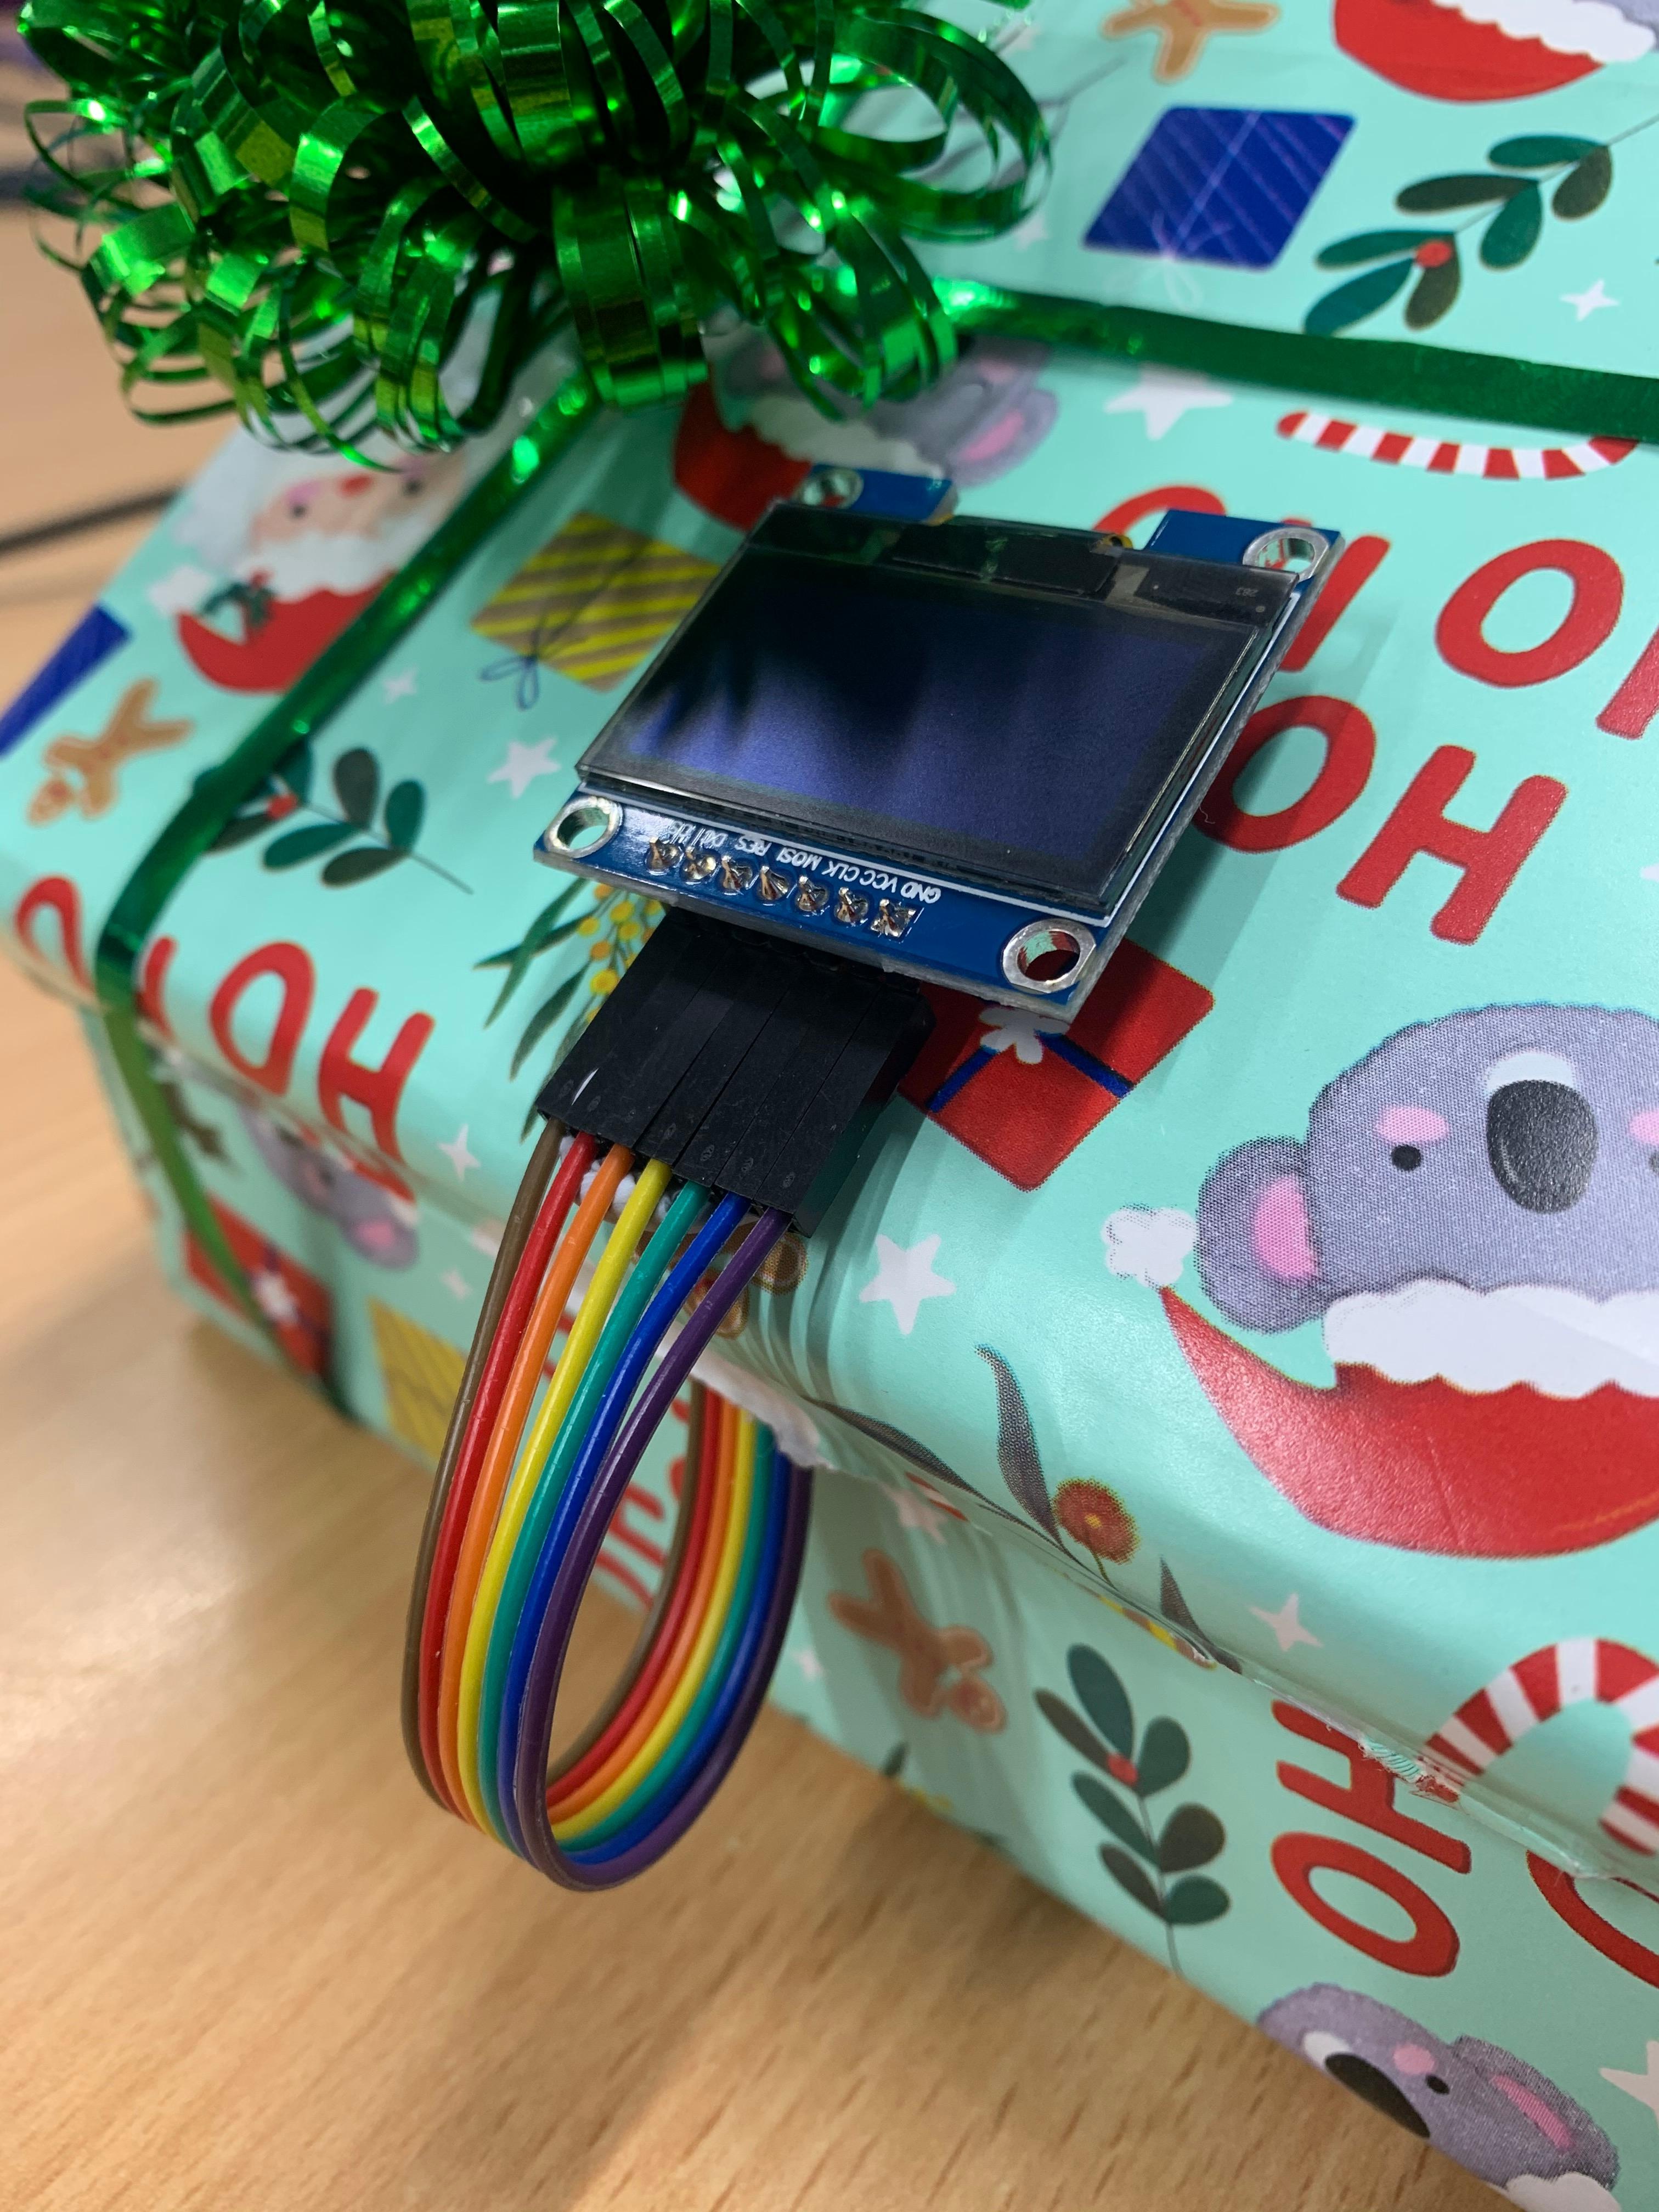
The basis of this is using the
Tri Axis tilt sensor to detect the magnitude of acceleration that the box is going under
We use
to find the total magnitude, and use a
to smooth out spikes in the data, so a sharp knock will not trip the shake counter (as the spike in data will be smoothed out). If you want to see this in action, uncomment the RAW_LOG define near the top of the code.
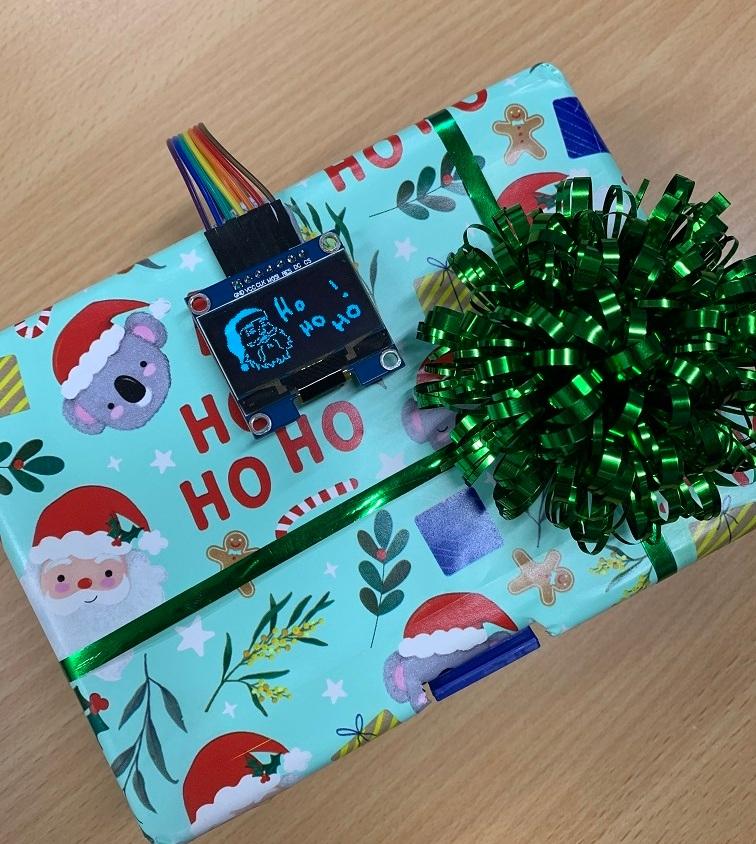
After about 5 shakes, we show another image on the OLED, and after 10 shakes, we generate a random number and "roll" to the gift that the person gets.
There's very limited memory on the ATMEGA 328P chip, which isn't made any easier with the variety of feature-full libraries that are available through the library manager. For this project, the memory space very quickly ran out of room trying to manage both the accelometer and oled objects, causing a reboot once it reaches to a certain point in the program.
To overcome this we used some resource allocation in our core methods: draw() and measureShake().
Here, each method
creates
the object that it is managing. For instance, the draw() function creates the U8g2lib object, draws things on the screen, and then deletes the object, thus freeing the memory. Similarly, the measureShake() will create the accelerometer management object, take readings, and store it in the buffer to be averaged later, before deleting the accelometer object again.
In many applications this is slow to do, but for our purposes, it actually functions fine and utilises more of the speed that is available for us via the ATMEGA328P.


.jpg%3Fbranch%3Dprod&w=1080&q=75)