An electric motor is one of the easiest ways to start off in the world of electronics. Here’s how.
Electric motors can be used to create all sorts of useful and fun gizmos. We’re going to create a simple circuit using a motor that can then be adapted for use in a fan, an air-powered car and a hovercraft.
What you need
‣ 2 x AA batteries
‣ 1 x 2AA switched battery enclosure
‣ 1 x low-torque hobby motor
‣ 1 x plastic milk bottle
‣ Hot glue gun and glue
‣ 1 x hobby knife (a hobby knife kit is a great addition to your tool set)
‣ Scissors
‣ Wire glue
‣ 1 x ruler
‣ 1 x permanent marker
Putting together the motor circuit
Step 1
Strip 1cm of insulation from the ends of the black and red wires coming from the battery enclosure.
Step 2
If you look at the base of the electric motor, you’ll see that the two terminals have small holes in them and one is marked with a ‘+’ sign. Thread the end of the red wire from the battery enclosure through the positive terminal and twist it so the wire is secure. Do the same with the black wire and the negative terminal. Use some wire glue to secure the wires to the terminals. Leave overnight to cure.
Step 3
Ensure that the switch on the battery enclosure is off. Put the two batteries into the enclosure.
Step 4
Turn the power on. The motor should start working.
Making a fan
A simple fan blade can be used to propel a car or hovercraft. Or you can use it to cool you down at your desk on a warm day. Be careful making this as you’ll be using a sharp blade.
Step 1
Cut a flat piece of plastic from the milk bottle that is 10cm long and 2cm wide.
Step 2
Use the ruler to measure the length of the piece of plastic and draw a line down the centre. Then measure the width of the plastic and draw a line along the middle. The intersection of the two lines is the exact centre of the plastic. Make a small hole in the centre. The hole needs to be a tight fit for the shaft coming out of the motor.
Step 3
Using your scissors, cut two small sections from either side of the centre that are 1.5cm wide by 0.5cm deep. You should now have a piece of plastic with a narrow centre section. Also using your scissors, round the corners of the fan blade.
Step 4
Bend one side of the fan blade so that the surface holds a curve and is no longer flat. Fold the other side of the fan in the opposite direction so that it’s no longer flat. That curvature will propel air through the blades to either keep you cool or create thrust.
Step 5
Attach the fan blade to the spindle on the motor in the fan direction. If there is no air flow, turn the blade the other way around before using a small amount of hot glue to secure it in place. Allow the glue to dry. Then you can turn the fan on and feel the air pushing through.
3 projects to use your new fan and motor
Project 1: A desk fan
You can mount the fan you’ve made on a small block of wood. Or you can make a base for it using LEGO® so you can direct the air it pushes towards you to keep you cool. Use a rubber band to hold the motor in place.
Project 2: A hovercraft
Place the motor on the back of a polystyrene tray. The tray will float on water. When you turn the fan on the hovercraft will be propelled across the water. You can use electrical tape to secure the motor and battery pack in position. Remember to balance the weight, and be careful not to get water into the motor circuit or battery enclosure.
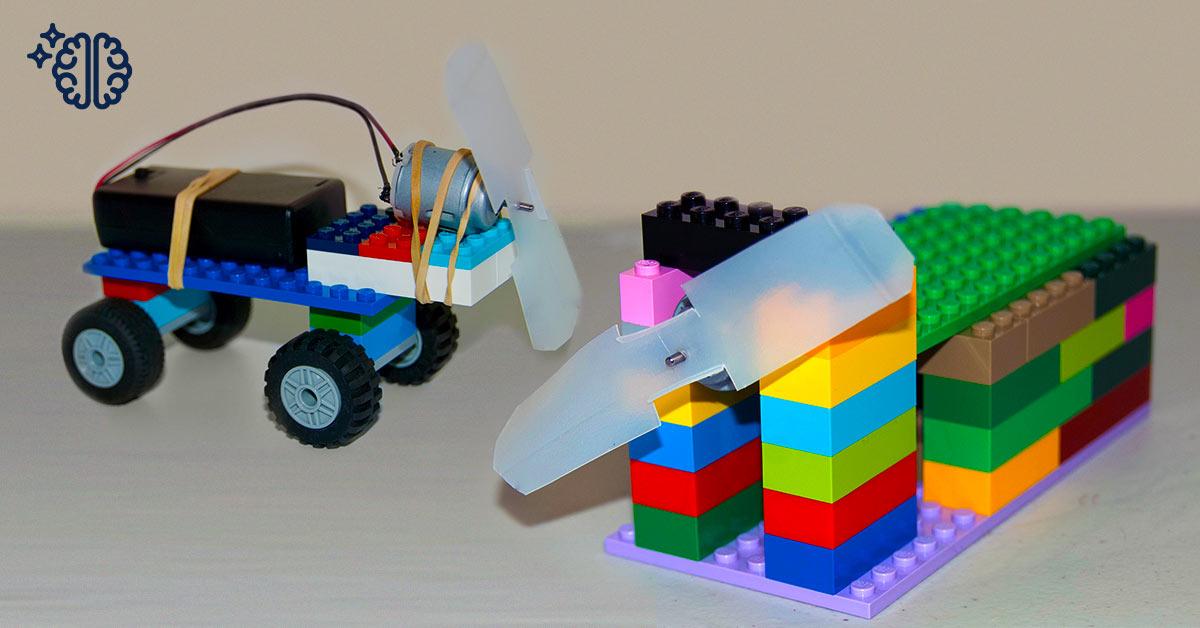
Project 3: A fan-powered car
Using LEGO®, build a simple car using a flat base piece and at least two pairs of wheels. Place the battery pack on the base and then put the motor on top. Use a rubber band to hold them in place. When you turn the motor on, the air movement will move the car forwards.
If you've created one of these projects or something else altogether, tag us on Facebook or Instagram.